5 QUICK SUGGESTIONS FOR REMOVING YOUR POPCORN CEILING
Are you looking at your ceiling and thinking…I need to modernize this popcorn ceiling? There are many things that came from the ’60s and ’70s, but you have agree that popcorn ceiling should have stayed there.
This was once an inexpensive option for homeowners to provide soundproofing, hide small imperfections and avoid addition painting. However in this day and age can be ugly and an embarrassment to you when having visitors to you home.
At Spokane Drywall we have a guide for you to remove those ugly lumps and bumps.
What could be a messy and time consuming project can actually be done fairly simply with the right advice. Here are a few tips for removing your popcorn ceiling and improve the look and feel of your home.
Tip #1: Check to see if your working with asbestos and paint
It very important to ass what is in your popcorn ceiling. If your home was built in the 80s be aware the asbestos was used in this stuff and could be harmful to your health if you mess with it too much.
At Spokane Drywall we can test your ceiling and send it to the lab. If the results come back positive for asbestos we would recommend covering it with drywall or applying a panel to simply cover it. This is a safer and budget friendly solution.
The next thing you want to consider is to check whether to popcorn ceiling was painted. Paint makes it more difficult to mix with water and therefore harder to scrape off.
Tip #2: Gather the right Equipment
If asbestos is not present your safe to begin. The great thing about this project is that it doesn’t require special equipment. It can be done with tools you may already have around the home.
Here’s a suggested list:
- Plastic Sheeting
- Painter’s Tape
- Small Ladder
- Safety Glasses
- Face Mask
- Wide putty knife
- Sanding Block
Tip #3 Prepare your area to make clean up easier
FYI…This is going to be messy! The more prep you can do beforehand the easier it will be to clean up
Protect your furniture by simply moving it out of the room your working on. This includes ceiling fans and light fixtures and any other structures. If moving them out is not an option try covering as much as you can with plastic sheeting.
Next step is to cut the power to the room. Cover the outlets with tape to avoid water and mess getting into the outlets
Final step is to cover your flooring and probably the bottom 1/3 of your walls with plastic sheeting.
Once done simply roll up the plastic and toss it out.
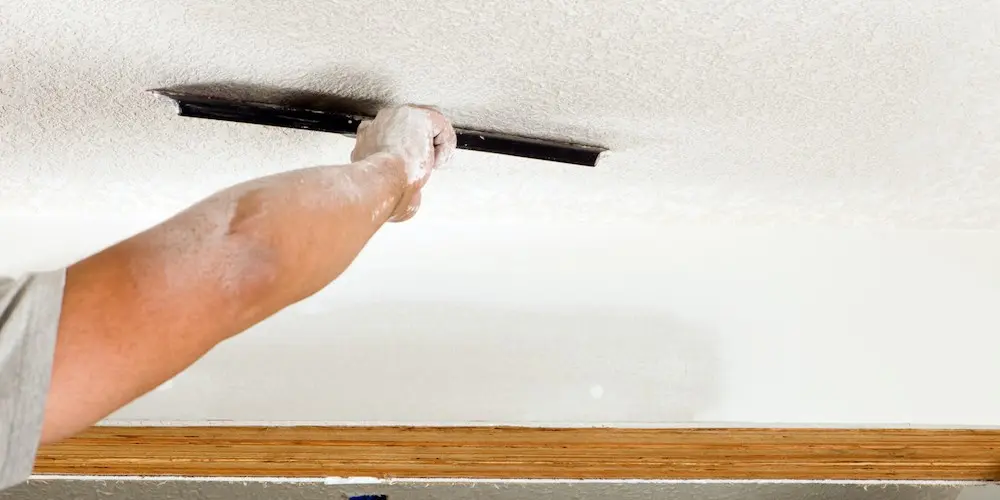
Tip #4 Soak the ceiling and start with small sections
Protect yourself by putting on your safety glasses and mask. Pick out a section of about 5 X5 ft (starting in the corner is advisable) and begin to soak the ceiling with a pump sprayer
Wait for 10-15 min to let the water absorb into the ceiling. Start scaping the section before the water dries out.
After completing that section move your ladder and start again. It is recommended to to hold out a mud pan to catch the mess coming down.
Tip #5 Clean up and Touch up
After finishing the removal portion take some time to inspect the ceiling and look for any dings and gouges. These can be covered up with joint compound. Once dry use you sanding block and rub everything until smooth.
At this point you can prime and paint the smooth ceiling to give it the fresh modern look.
Once this is done wrap up and throw away the plastic sheeting and finalize the cleanup
Reinstall fans, scones, light fixtures and return your furniture. Turn the power back on and enjoy your smooth fresh new ceiling.
Get the job done right with Spokane Wa Drywall
Spokane Wa Drywall has provided high-quality drywall tools and expertise to our customers for more than 12 years. Give us a call for a hand in finishing your next job.